Friday, August 3, 2012

Sweet Dreams

The best part of the bus:  we are upsizing to a king size bed.  Hells yes.  That queen size bed was way too small for us and none of us slept well.  So we are making a king size bed fit into our tiny little space.  Here is Jim Bob building the bed at around midnight or so...


The mattress will sit on this platform about 36" high.  Underneath the bed will be our "classroom" area.  All of the kids' furniture, toys, books and our clothes.  We were worried about how much headroom that would leave us but it turned out fine!

The book cases we had in the house are 36" high and 16" wide.  Jim Bob built the bed frame around the bookcases.   

We bought the mattress from Ikea.  We lucked out that it came all rolled up because we were sweating a king size mattress fitting through the door.


We are all moved in!  Well, almost.

Wednesday, August 1, 2012

Two sweet words: Air conditioning


So the bus is basically a huge tin can or metal can with zero insulation and lots of drafty windows - not the best living situation in Texas.  With all those factors, we decided to go with two 10, 000 btu air conditioning units.  We put one in the front of the bus, above the heater, and one in the back of the bus, above the toilet.

The windows have a 3/4" plywood layer, 1/2" foam layer and then the sheet metal on the outside.

Jim Bob used a jigsaw to cut out the shape in the window.


Another hole!

Hunter and Jim Bob putting the window unit into the window.

Air conditioner almost in!  Yay!

Pantry

Two pantries are being built to go over the wheel wells and will also define the bathroom/bedroom area - I guess we should have a bit of privacy for our daily dooties.

Of course, Jim Bob couldn't just build a shelf that goes straight across.  Oh no, it has to be a tight fitting, follow the curve of the bus, holy crap we need to move in NOW pantry.  The pantry was close to being the last thing on the list that was built.  We needed to be out of the house in two or so days and Jim Bob is calmly cutting cardboard.  He is something else!

He used the refrigerator box to make a template for the MDF wall.  He used tiny tabs and tape to move the tab up to the curve of the bus and taped them to the template.  Then he took the template to the MDF and followed the lines of the tabs and then cut it out of the MDF.  Sounds easy right?  Pah!


Jim Bob is making the tabs.


Alright, so you thought he would use the same template for all four sides of the two pantries, right? Wrong. He made four different templates for the four pantry walls. Here is template #2.


Here is the finished MDF board cut to precise measurement.  Isn't it beautiful.  He is such a bad ass.


One side down!  He made sure that it would fit our dirty cloths basket.  It was easier to build the pantry to fit the basket instead of finding a basket that would fit our pantry.


I got my paint on! Now I know I didn't see the vision in the pantries that he did but once they were all built and finished, these pantries make our little bus. They are way cool, perfect size and perfectly built! Nice job, Jim Bob!

This shot is taken from the back of the bus looking towards the front.  The right side is the bathtub side and the left side is the water line for the toilet. 

Kitchen and Appliances

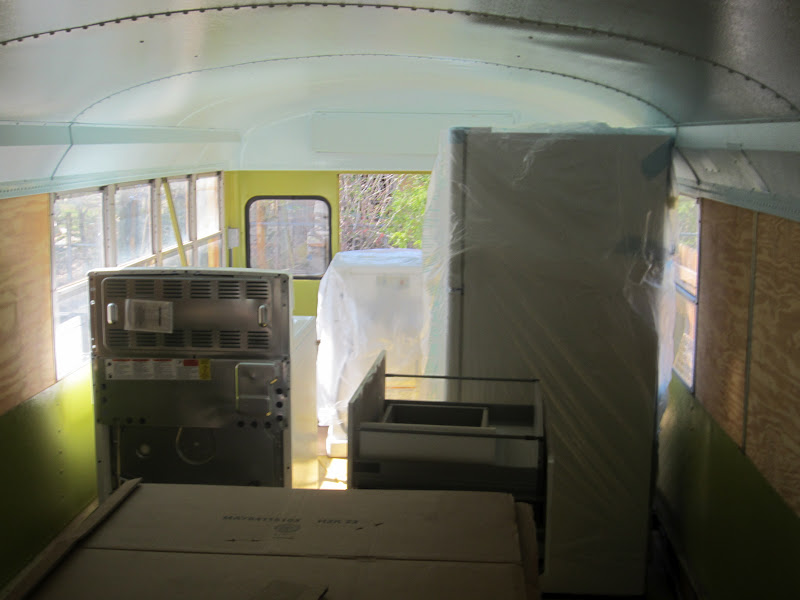
We bought full size appliances for the bus.  We thought even though we are short on space, we are still a family of four that needs full size appliances and not dinky little things that can only hold a gallon of milk and nothing else.  Jim Bob and Hunter picked each appliance up and shoved it through the back door.  So here they sit until we had the rest of the bus finished.  Sears had a Kenmore sale one weekend - so that is what we bought.  Kenmore fridge, stove and front loading washing machine.

Finally the Ikea kitchen cabinets found their home!  Jim Bob is leveling them all up.  This is the kitchen sink side.

Counter tops!  We used stacked 3/4" MDF (medium density fiberboard) for the counter tops. To get them all nice and shiny, Jim Bob polyurethaned the heck out of them.  I'm talking like 12 coats or something.  Alright, not 12 coats more like four.  It just seemed like 12.   

The kitchen sink (we bought off of EBay) came with a template to cut the hole with. 

Look at that reflection in the counter top - we can almost see ourselves!
The cool thing about the counter tops is that they are a bit deeper because of that metal lip that the seats used to sit on.  It is only 1 3/8" but that makes a big difference when you have your soap dish and sponges sitting up there. 

Jim Bob is installing drawers and making sure they open and close properly. 

Here it is!  Dry run of the kitchen - pretty exciting!

The kitchen sink still needs some plumbing in this photo but I was so excited to see our faucet that I had to take the picture.  We bought the Moen faucet at Home Depot - LOVE IT!


The sink sits PERFECT in the hole.  Isn't the shape cool?   I am fan. 


Bathtub

Jim traced an outline of the bathtub on the floor and decided where the drain was going to be.  Then he drilled, yet another, hole through the floor with a hole saw.

Jim Bob made a nifty jig to recess the bottom of the stock tank to accommodate the drain.  We wanted the drain flush with the bottom so the water would flow right out. 

He used a hammer and a old socket to hammer the inside of the stock tank to make it take the shape of the jig.  Pretty cool, eh?

The bathtub drain will sit down into recessed form.  Jim Bob is making sure it is deep enough and will allow the water to easily flow down the drain.

Then a tiny pilot hole is drilled to mark the spot for the hole saw.  We love that tool!


Check it out.  Another hole!


The drain is set into place! 

This is the underside of the tub and shows the drain sitting tight in its new home.

The kiddos giving the tub a dry run. 

PVC pipe is attached to the drain.  This will go through the hole in the floor and connected to the sewer line under the bus with the rubber coupler you saw in the "sewer line" photos.  That rubber coupler slides off if we ever need to remove the tub.

Here is the tub!  It is a 2' wide x 2' tall x 34" long Hastings livestock watering tank.  We tried to find one not quite so tall but had no luck.  We looked at these tubs for months and months.  Every feed store we saw, we stopped and checked them all out.   We will add a shower rod and curtain at a later date.

Here is the plumbing marvel for the shower.  The red line on the left takes the water down into the tub for bath time.  The short red lines are the hot water side and the short blue lines are the cold water. There are four knobs to work on this bad boy.  Turn the wrong one on and you might get a surprise shower!  I am still figuring it all out!