Jim traced an outline of the bathtub on the floor and decided where the drain was going to be. Then he drilled, yet another, hole through the floor with a hole saw.
Jim Bob made a nifty jig to recess the bottom of the stock tank to accommodate the drain. We wanted the drain flush with the bottom so the water would flow right out.
He used a hammer and a old socket to hammer the inside of the stock tank to make it take the shape of the jig. Pretty cool, eh?
The bathtub drain will sit down into recessed form. Jim Bob is making sure it is deep enough and will allow the water to easily flow down the drain.
Then a tiny pilot hole is drilled to mark the spot for the hole saw. We love that tool!
Check it out. Another hole!
The drain is set into place!
This is the underside of the tub and shows the drain sitting tight in its new home.
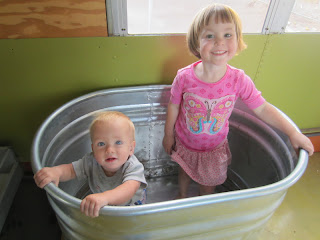
The kiddos giving the tub a dry run.
PVC pipe is attached to the drain. This will go through the hole in the floor and connected to the sewer line under the bus with the rubber coupler you saw in the "sewer line" photos. That rubber coupler slides off if we ever need to remove the tub.
Here is the tub! It is a 2' wide x 2' tall x 34" long Hastings livestock watering tank. We tried to find one not quite so tall but had no luck. We looked at these tubs for months and months. Every feed store we saw, we stopped and checked them all out. We will add a shower rod and curtain at a later date.
Here is the plumbing marvel for the shower. The red line on the left takes the water down into the tub for bath time. The short red lines are the hot water side and the short blue lines are the cold water. There are four knobs to work on this bad boy. Turn the wrong one on and you might get a surprise shower! I am still figuring it all out!


No comments:
Leave a Comment